

I’ve tested hundreds of smart devices over the past three years, and here’s what nobody tells you: you need protocol diversity before you need expensive specialized gear. Last month I walked into a client site with £2,000 worth of equipment. The vulnerability that gave me access? A misconfigured Zigbee light bulb that cost £12. Your IoT penetration testing kit needs to cover wireless protocols first, then you build depth.
Most “complete bundles” miss half the attack surface. They’ll load you up with WiFi gear but ignore Bluetooth Low Energy. Or they’ll include SDR hardware without the software-defined toolchain to actually use it. After burning through three different setups that left protocol gaps, I built a modular kit that covers 90% of real-world IoT deployments. This isn’t theory. This is what’s in my bag when I walk into smart building assessments.
Your base layer needs to handle the big four: WiFi, Bluetooth/BLE, Zigbee, and Z-Wave. Miss any of these and you’re blind to entire device categories.
I start every IoT assessment with a Flipper Zero because it’s the fastest way to enumerate what protocols are actually in use. You walk through a building, run the frequency analyzer, and immediately see which bands are active. I’ve found undocumented Z-Wave door locks, hidden BLE beacons, and rogue 433MHz sensors that weren’t in any asset inventory. The Flipper handles Sub-GHz (315/433/868/915 MHz), RFID/NFC (125kHz and 13.56MHz), infrared, and basic GPIO. That’s your reconnaissance layer.
But the Flipper can’t capture full Zigbee packet streams or handle complex protocol analysis. That’s where dedicated protocol sniffers come in. A Zigbee Sniffer Kit built around Texas Instruments CC2531 or nRF52840 gives you proper packet capture in Wireshark. I spent two days troubleshooting a Philips Hue vulnerability before realizing my Flipper wasn’t capturing the full frame sequence. The dedicated sniffer showed the plaintext commissioning traffic immediately.
For Bluetooth and BLE work, you need something that can both scan and inject. The ESP32 Development Board runs firmware like ESP32Marauder and can perform deauth attacks, beacon spam, and packet injection across 2.4GHz WiFi and BLE simultaneously. I keep three ESP32 boards in my kit: one for persistent monitoring, one for active attacks, and one as a hot spare. At £8 per board, there’s no excuse not to have redundancy.
Your IoT penetration testing kit needs a brain that can run Kali Linux tools, process packet captures, and handle multiple USB peripherals simultaneously. I’ve tried doing this on laptops, and the USB hub hell alone will make you reconsider your life choices.
The Raspberry Pi 5 8GB changed my entire workflow. I run it as a dedicated IoT testing station with Kali ARM, and it handles Wireshark, Scapy, Ubertooth, and SDR tools without thermal throttling. More importantly, it’s small enough to deploy on-site for persistent monitoring. I left one running in a client’s network closet for a week capturing Zigbee traffic patterns. Try that with a laptop without someone noticing.
Here’s the setup that works: Pi 5 with NVMe boot (faster than SD cards), 7-inch touchscreen for field use, and a powered USB 3.0 hub for all your protocol adapters. I image the microSD card with a custom Kali build that includes all the IoT-specific tools pre-configured. When I show up on-site, I’m capturing packets within five minutes of walking in the door.
The Pi’s GPIO pins are also underrated for hardware hacking. I’ve used them to interface with UART on smart thermostats, SPI on security cameras, and I2C on industrial sensors. You can do this on a laptop with USB adapters, but having native GPIO right there makes rapid testing so much faster.
Your hardware is useless without the right toolchain. On the Pi 5, I run:
I also keep a Docker container with all the SDR tools (GNU Radio, Universal Radio Hacker, rtl_433) ready to deploy when I need to analyze proprietary protocols. Learned this after wasting three hours reinstalling dependencies on-site.
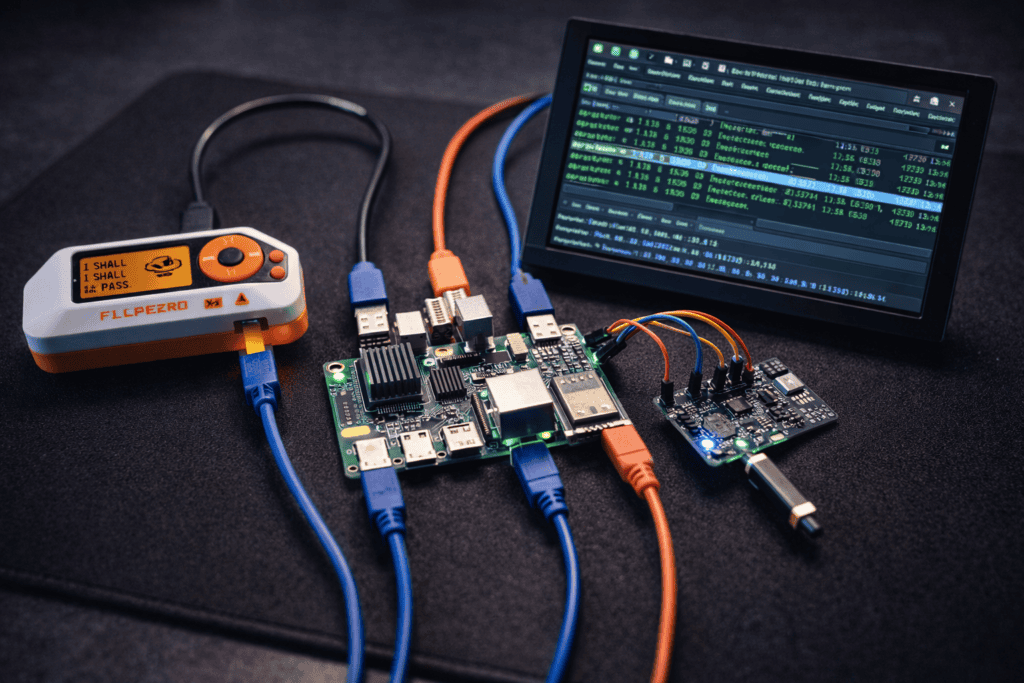
The four-device core covers most scenarios, but real penetration testing reveals where you need specialists. I add tools based on actual assessment requirements, not because they look cool.
RTL-SDR for wide-spectrum surveillance — An RTL-SDR dongle (£25) lets you monitor everything from 24MHz to 1.7GHz. I use it with Universal Radio Hacker to decode proprietary smart meter protocols and identify undocumented wireless devices. Last assessment, I found a facilities management system transmitting unencrypted HVAC commands on 900MHz. The RTL-SDR caught it; none of my other tools would have.
HackRF One when you need transmit capability — The RTL-SDR only receives. HackRF One gives you transmit from 1MHz to 6GHz. I don’t carry it to every job, but for industrial IoT or automotive testing, you need to replay and inject custom signals. I’ve used it to test smart parking meters, building access control systems, and wireless emergency stop buttons. Not exactly script kiddie territory, but critical for comprehensive assessments.
Proxmark3 RDV4 for RFID depth — The Flipper Zero handles basic RFID, but when you need to crack crypto on Mifare DESFire or clone high-frequency badges, Proxmark3 is the standard. I keep one in my kit specifically for physical access control assessments. Spent six hours with a client’s “military-grade secure” smart lock before discovering it used RFID cards with a static UID and zero crypto. Proxmark cloned it in 30 seconds.
CAN Bus tools for automotive/industrial — If you’re testing connected vehicles or industrial control systems, add a CANtact or similar USB CAN interface. I learned this the hard way during a fleet management assessment. All the vehicle telemetry went over CAN bus, and I had zero tools to interface with it. Had to order hardware overnight.
Here’s what’s actually in my primary IoT penetration testing kit, organized in a Pelican 1450 case:
Tier 1 (Always deployed):
Tier 2 (Scenario-dependent):
Support gear:
Total cost: Around £1,200 for Tier 1, another £800 if you add everything in Tier 2. Compare that to “professional IoT pentesting bundles” at £5,000+ that include half this functionality.
I’ve refined this workflow over dozens of smart home, smart building, and industrial IoT assessments. Your IoT penetration testing kit needs to support a systematic methodology, not random tool throwing.
Phase 1: Passive reconnaissance with Flipper Zero — Walk the environment running frequency analyzer and RFID detection. Document every wireless signal, identify protocols in use, enumerate devices by signal strength and behavior. I usually find 30-40% more devices than what’s in the client’s asset list.
Phase 2: Protocol enumeration with Pi 5 + sniffers — Connect Zigbee sniffer and RTL-SDR to the Pi. Start packet captures on all active protocols. Use Wireshark to identify device types, firmware versions, and communication patterns. Look for plaintext credentials, weak encryption, or exploitable command structures.
Phase 3: Active testing with ESP32 — Once you understand the protocol landscape, switch to active mode. Use ESP32 to perform BLE scanning with characteristic enumeration, WiFi deauth attacks to test fallback security, and beacon injection to test device response to malicious packets. The goal is finding authentication weaknesses without causing availability issues.
Phase 4: Exploitation with specialized tools — Depending on what Phase 1-3 revealed, deploy specialists. Proxmark3 for RFID cloning, HackRF for signal replay, logic analyzer for hardware interface exploitation. This is where you validate whether theoretical vulnerabilities are actually exploitable.
I document everything in real-time on the Pi 5 using terminal recording and packet capture annotations. When you’re presenting findings, showing the actual exploit sequence in Wireshark with your hardware timestamps is infinitely more credible than “trust me, it’s vulnerable.”
You don’t need to drop £2,000 on day one. I started with a Flipper Zero and an ESP32 (total: £310) and added tools based on actual client needs. Your first ten assessments will teach you way more about what you need than any buying guide.
Minimum viable kit (£400-500): Start with Flipper Zero, one ESP32 board, and an RTL-SDR. Run Kali on your laptop initially. This covers WiFi, BLE, Sub-GHz, and basic RF surveillance. You can do real IoT pentesting with just these three tools. I’ve found critical vulnerabilities in smart locks, thermostats, and security cameras using nothing but this setup.
Intermediate kit (£800-1000): Add the Raspberry Pi 5 setup and Zigbee sniffer. Now you have dedicated processing power and full mesh protocol coverage. This is where I stayed for about six months before adding specialists.
Advanced kit (£1500-2000): Proxmark3, HackRF One, and automotive/industrial interfaces. Only add these when you’re consistently hitting limitations with the intermediate kit. I didn’t buy my HackRF until I had three clients in one month asking for industrial IoT assessments.
The modular approach also means you’re not carrying £2,000 of gear to every job. For a standard smart home assessment, I grab the Tier 1 case. For industrial work, I pack everything. Match your loadout to the scope.
Your IoT penetration testing kit doesn’t exist in isolation. I connect it to my existing security testing infrastructure through a few key integrations.
The Raspberry Pi 5 runs an SSH server and can VPN back to my lab network. When I’m doing on-site monitoring, I can remotely access packet captures and tool output without physically returning to the device. I’ve left Pi setups running for weeks capturing IoT traffic patterns, pulling PCAP files remotely for analysis.
For reporting, I use Python scripts on the Pi to automatically parse Wireshark captures and generate device inventories with security grades. Feed it a week of Zigbee captures and it outputs a spreadsheet of every device, its firmware version, encryption status, and known CVEs. Clients love this because it’s actionable data, not just “we found vulnerabilities.”
I also maintain a lab network at home that mirrors common IoT deployments: Zigbee mesh with Hue lights, Z-Wave smart lock, WiFi cameras, BLE sensors, the works. Before I take a new tool to a client site, I validate it works against my test environment. Learned this after bringing an untested Zigbee exploit to an assessment and discovering I’d misconfigured the attack parameters. Embarrassing.
What’s the minimum budget for a functional IoT penetration testing kit? Around £400-500 gets you Flipper Zero, ESP32 board, and RTL-SDR dongle. This covers WiFi, BLE, Sub-GHz, and basic RF monitoring. You can perform legitimate security assessments with just these three tools. I’ve found critical vulnerabilities in enterprise deployments using exactly this setup.
Do I need separate hardware for Zigbee and Z-Wave testing? Yes. Zigbee operates on 2.4GHz using IEEE 802.15.4, while Z-Wave uses proprietary protocols on sub-GHz bands (around 900MHz depending on region). Your Zigbee sniffer won’t see Z-Wave traffic. Flipper Zero handles basic Z-Wave recon, but for full protocol analysis you need dedicated Z-Wave hardware like the Z-Wave.Me UZB stick.
Can I run all these tools from a laptop instead of Raspberry Pi? Technically yes, but USB device management becomes painful with 5-6 adapters connected. The Pi 5 also gives you GPIO for hardware interfaces and can be deployed for persistent on-site monitoring without leaving a £1,500 laptop in a network closet. I’ve done both approaches and the dedicated Pi setup is significantly cleaner.
How do I stay legal when testing IoT devices? Written authorization covering specific devices and protocols before you start. Your scope should explicitly list which wireless protocols you’re authorized to test, which devices are in scope, and what “destructive testing” means in that context. I also recommend Faraday bags for tools like USB Kill and getting explicit approval before performing deauth attacks on production networks.
Your IoT penetration testing kit should evolve with your assessment experience, not some vendor’s idea of what you need. I’ve been refining mine for three years, and it’s still changing based on what I encounter in the field. The protocols aren’t going anywhere, but the specific vulnerabilities you’re hunting absolutely are.
Start with protocol diversity. Make sure you can see WiFi, Bluetooth, Zigbee, and Sub-GHz. Add depth in the protocols you actually test most frequently. Keep your software stack updated and your methodology documented. And test everything in your home lab before you take it to a client site.
The kit I described isn’t the “ultimate” setup, it’s what works for the assessments I actually do. Build yours based on your work. Every tool I carry has found a critical vulnerability at least once. If something’s just collecting dust, leave it home.
Ready to build your IoT testing setup? Check out the complete hardware lineup at wai-works.com — we stock everything from entry-level ESP32 boards to complete pentesting bundles. All the
