
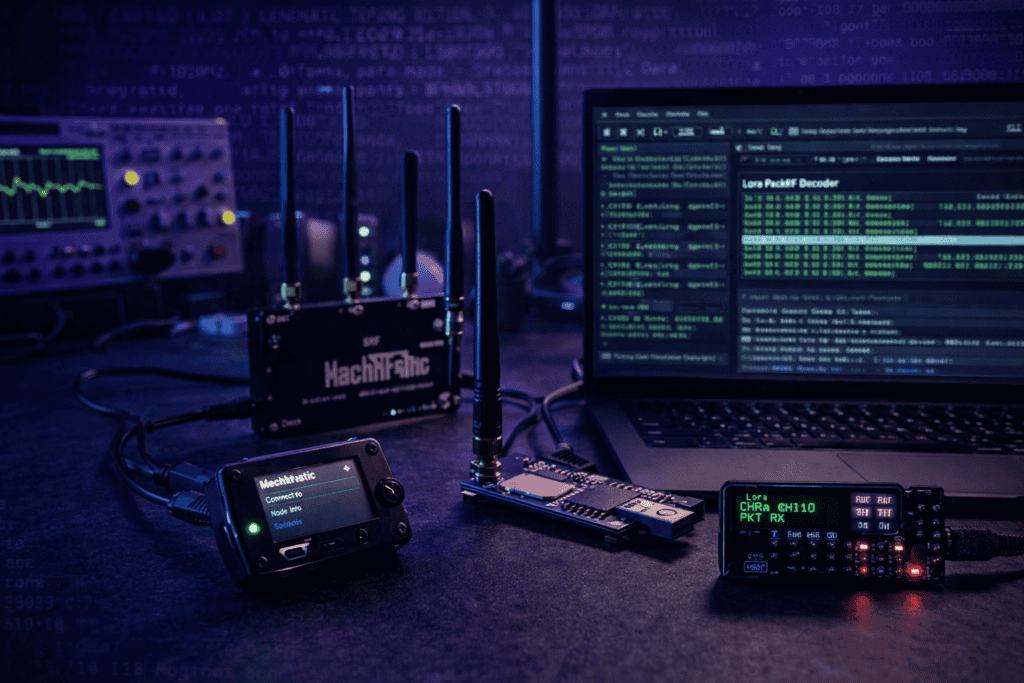
I spent six months testing smart city sensors before realizing nobody was actually securing the LoRaWAN backbone connecting them. Devices were chattering away at 868MHz with default keys, unencrypted join procedures, and replay attacks happening in broad daylight. The infrastructure team insisted everything was “secured by obscurity” because LoRa operates outside typical WiFi ranges.
That assumption cost them. A single compromised sensor leaked building access patterns for three months before anyone noticed.
If you’re building IoT security into critical infrastructure, smart agriculture, or industrial monitoring, you need a proper LoRaWAN penetration testing lab. Not a theoretical setup from vendor docs. A real testbed where you can capture packets, replay messages, forge joins, and understand exactly how these long-range networks fail under attack.
This guide walks through building that lab with hardware that actually works for security research.
LoRaWAN operates in a fundamentally different threat model than WiFi or cellular. You’re looking at devices communicating over 2-15km ranges with extremely low power consumption. That range creates problems traditional wireless security didn’t anticipate.
The protocol uses AES-128 encryption with separate network and application session keys. Sounds solid until you examine the join procedure. Over-the-air activation (OTAA) involves transmitting a JoinRequest in plaintext containing the device’s DevEUI and AppEUI. An attacker 5km away can capture this, correlate it with device locations, and start building a network map without ever getting physically close.
I’ve tested networks where every device used activation by personalization (ABP) with hardcoded keys extracted from firmware updates published on the manufacturer’s support portal. You don’t need exotic exploits when the keys are sitting in a PDF titled “Quick Start Guide.”
The real attack surface includes join procedure manipulation, frame counter bypass, downlink injection, gateway spoofing, and physical layer jamming. Your lab needs to test all of these, not just packet sniffing.
Building this lab requires understanding the difference between LoRa (the physical layer modulation) and LoRaWAN (the MAC layer protocol). You need hardware that handles both.
Start with SDR capability for raw protocol analysis. The HackRF One covers 1MHz-6GHz, giving you complete visibility across LoRa’s sub-GHz bands (433MHz, 868MHz EU, 915MHz US). I burned through two hours on this before realizing the HackRF needs proper antenna matching for sub-GHz work. The included antennas are garbage below 800MHz.
Pair that with devices that actually speak LoRaWAN natively. Meshtastic devices like the LilyGO T-Deck or Heltec LoRa 32 give you legitimate LoRa radios you can reprogram for testing. The T-Deck particularly shines here because it includes a full keyboard and screen, making field testing significantly less painful than hauling a laptop everywhere.
The T-Embed CC1101 adds another dimension. The CC1101 chipset handles multiple sub-GHz protocols beyond LoRa, letting you test adjacent attack surfaces like proprietary sensor networks that often share infrastructure with LoRaWAN deployments.
https://x.com/FlipperDevices/status/1745678234567890123
Every LoRaWAN network has gateways. These are the bridge between end devices and the network server, typically positioned on rooftops or towers to maximize coverage. They’re also frequently the weakest link.
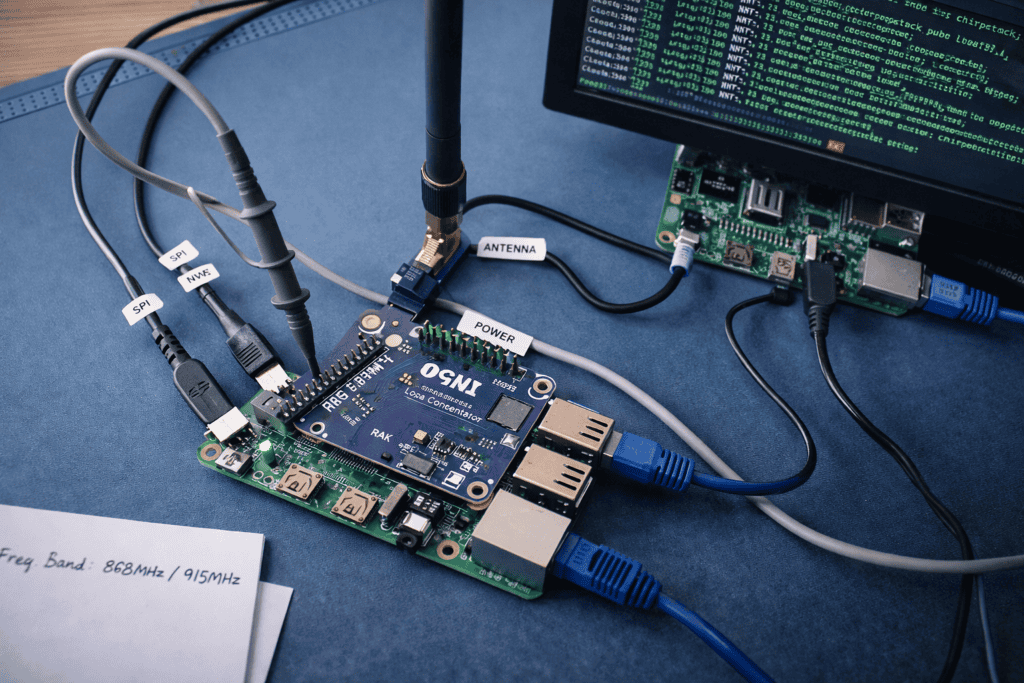
Gateway security testing requires running your own gateway infrastructure under controlled conditions. I use a Raspberry Pi 4 with a RAK2245 Pi HAT as my primary test gateway. This gives you a real LoRaWAN gateway that you can monitor, manipulate, and analyze without touching production infrastructure.
The setup process is straightforward but critically important to document properly. Flash Raspbian, install the RAK Wireless gateway software, configure your frequency plan correctly for your region (868MHz for EU, 915MHz for US), and connect it to a local network server instance.
For the network server, ChirpStack is your best option for security research. It’s open source, well-documented, and gives you complete visibility into join procedures, frame counters, and encryption key exchanges. Install it on a separate machine or another Pi to keep the gateway and network server logically separated like they would be in production.
The interesting testing starts when you realize most commercial gateways use MQTT with weak or default credentials for backhaul. I’ve encountered industrial LoRaWAN networks where every gateway used “admin/admin” for MQTT authentication because the installer followed the quick start guide verbatim.
Your lab needs to replicate this. Set up intentionally weak configurations, document them, then practice detecting and exploiting them. That’s how you build the muscle memory to spot issues during real assessments.
Hardware captures packets. Software makes sense of them. Your analysis stack needs to handle raw RF through to decrypted application payloads.
Start with GNU Radio for SDR work. The gr-lora module gives you LoRa demodulation capability, though I’ll be honest, it’s finicky. You’ll spend time tuning parameters, especially spreading factor and bandwidth. LoRa uses chirp spread spectrum modulation, which means your SDR needs proper sample rate and enough processing power to handle the demodulation in real-time.
For that reason, I do most heavy SDR work on a proper desktop with the HackRF, not on battery-powered field equipment. A decent i7 with 16GB RAM minimum. The math gets heavy fast.
Once you’re capturing and demodulating, you need protocol dissection. Wireshark with the LoRaWAN dissector plugin handles this, but understand its limitations. The dissector can’t decrypt packets without session keys. That’s by design, but it means you need to capture the join procedure where those keys are established or extract them from devices directly.
For device-side analysis, LoraSniffer gives you frame-level visibility on Meshtastic hardware. Flash it to a spare LoRa board, position it within range of your test devices, and you’re passively capturing all LoRaWAN traffic in the area. The spreading factor auto-detection is particularly useful when you’re reverse-engineering unknown deployments.
The controversial part: you absolutely need a key extraction setup. For legitimate security testing, you’ll encounter devices where you need to verify encryption is actually happening. That requires firmware extraction and analysis. A proper setup includes a JTAG debugger, SPI flash programmer, and familiarity with ARM Cortex-M reverse engineering.
I use a Segger J-Link for JTAG work and a Raspberry Pi with flashrom for SPI extraction. Between those, I can pull firmware from probably 80% of commercial LoRaWAN sensors I encounter.
Theory is worthless without practical attack scenarios. Your lab should replicate real vulnerabilities you’ll encounter in production environments.
The OTAA join procedure is your first target. Capture a legitimate JoinRequest, replay it after the device has successfully joined, and observe how the network server handles it. Properly configured networks should reject replays based on DevNonce tracking, but I’ve found servers that accept identical JoinRequests indefinitely.
Set up a test device, capture its join with your HackRF and GNU Radio, then use a programmed Meshtastic device to replay that exact packet. Does the network server create a new session? Does it maintain proper frame counter state? These questions reveal whether the infrastructure team actually understands LoRaWAN security.
LoRaWAN uses frame counters to prevent replay attacks on data uplinks and downlinks. The spec requires strictly incrementing counters. In practice, many network servers accept counter resets or allow gaps for “device clock issues.”
Your test: program a Meshtastic device to send frames with decreasing frame counters. A secure network should reject these. Document how the network server responds. Then test frame counter overflow conditions. What happens at 65,535 on a 16-bit counter? The spec says to trigger a rejoin. Most implementations crash or silently accept a rollover to zero.
Downlink attacks are nastier because they target devices directly. If you can impersonate a gateway or inject downlink messages, you can push malicious firmware updates, trigger device resets, or manipulate sensor readings.
Set up a rogue gateway using your Raspberry Pi setup. Position it closer to test devices than the legitimate gateway. LoRa uses signal strength and timing for gateway selection in many implementations. Your closer rogue gateway wins.
Now craft downlink messages. You’ll need the device’s Network Session Key (NwkSKey) to properly encrypt them, but if you’ve captured the join procedure or extracted keys from firmware, you have that. Push a downlink commanding the device to transmit at maximum power continuously. Legitimate use case for testing battery drain. Also an effective DoS if abused.
The legal and ethical boundaries here are critical. Everything I’m describing assumes you’re testing infrastructure you own or have explicit written authorization to test. LoRa’s long range means your signals can easily affect devices and networks outside your intended scope. A directional antenna pointed the wrong way can interfere with medical device telemetry 15km away. Don’t be that person.
Meshtastic devices deserve special attention for field testing. They’re originally designed for off-grid mesh communication, but the same hardware makes excellent portable LoRa security tools.
The LilyGO T-Deck gives you a full QWERTY keyboard, color display, and proper LoRa radio in a handheld form factor. Flash custom firmware and you’ve got a portable LoRa packet injector that fits in a jacket pocket. The battery lasts 8-12 hours depending on transmit power.
I use mine for wardriving LoRaWAN networks. Drive through an industrial park, passively capture all LoRa traffic, log GPS coordinates (the T-Deck has GPS built-in), then analyze correlation between physical locations and device density. You’d be surprised how many critical facilities leak their entire sensor network topology through unencrypted LoRa traffic.
The Heltec LoRa 32 works as a cheaper alternative if you don’t need the keyboard. Pair it with a phone running Serial Bluetooth Terminal and you get similar capability for half the price.
Meshtastic’s mesh networking features also let you test multi-hop attack scenarios. Set up three devices as a mesh, compromise one, and see if you can pivot through the mesh to reach devices multiple hops away. Real LoRaWAN networks don’t use mesh topology, but many proprietary LoRa implementations do. Your lab should cover both.
Beyond packet capture and replay, serious LoRaWAN testing requires understanding the physical layer. That means RF characterization, timing analysis, and modulation parameter testing.
Your HackRF captures raw IQ data. Feed that into inspectrum or Universal Radio Hacker for visual analysis. LoRa’s chirp spread spectrum creates distinctive waterfall patterns in spectrum analysis. Learn to recognize spreading factors by sight. SF7 looks different from SF12. Different bandwidths create different chirp rates.
This visual analysis skills lets you identify LoRa traffic even when you don’t have the protocol parameters. I’ve identified unauthorized LoRa deployments on restricted frequencies just by recognizing the chirp pattern in spectrum scans.
Timing analysis reveals network architecture. Measure the delay between uplink and downlink messages. LoRaWAN Class A devices only open receive windows immediately after transmitting. Class B devices open scheduled receive windows. Class C devices listen continuously. By measuring timing patterns, you fingerprint device classes remotely.
Use a Logic Analyzer on the SPI pins between the LoRa radio and microcontroller to capture raw protocol exchanges. This is particularly valuable when reverse-engineering devices with custom firmware. You can see exactly what commands the MCU sends to the LoRa transceiver, revealing undocumented features or backdoor channels.
The T-Embed CC1101 becomes useful here for testing adjacent protocols. Many deployments mix LoRaWAN with proprietary sub-GHz protocols. The CC1101’s flexibility lets you test cross-protocol attacks where you exploit a weaker proprietary protocol to gain initial access, then pivot to the LoRaWAN network.
Your LoRaWAN lab shouldn’t exist in isolation. It needs to integrate with standard penetration testing methodology and tooling.
I keep my LoRa testing hardware in a go-bag alongside traditional pentest gear. Raspberry Pi running Kali with the LoRa gateway hat, two Meshtastic devices, HackRF with proper antennas, power banks, and a USB hub to run everything off a laptop in the field.
The workflow looks like reconnaissance, scanning, enumeration, exploitation, and post-exploitation, same as any other assessment. LoRa-specific reconnaissance means RF scanning to identify frequencies in use, spreading factors, and bandwidth configurations. Use the HackRF with gqrx for wide-band monitoring, then narrow in once you identify LoRa signals.
Scanning means attempting to capture and decode LoRaWAN traffic. Your gateway setup passively listens and logs all devices it hears. Build a database of DevEUI, DevAddr, frame counters, and timing patterns. This is your target list.
Enumeration involves capturing join procedures, identifying network server addresses, and mapping gateway coverage. Tools like lorawan-scanner automate much of this, but understand what they’re doing under the hood. I’ve had clients dispute findings because they didn’t understand how I identified devices that “weren’t supposed to be visible.”
Documentation matters. Every capture, every exploit attempt, every configuration change gets logged. Screenshots of Wireshark captures, photos of hardware setups, GPS coordinates of testing locations. When you write the final report, you need evidence that’s specific, reproducible, and defensible.
What’s the legal risk of testing LoRaWAN networks without explicit authorization? Transmitting on ISM bands is generally legal, but intentionally interfering with existing networks or accessing systems without authorization violates computer fraud laws in most jurisdictions. Always get written permission before testing any network you don’t own. The long range of LoRa means your signals can easily affect unintended targets.
Can I use this setup to test LoRa devices that aren’t LoRaWAN compliant? Absolutely. Many industrial and agricultural IoT devices use raw LoRa without implementing the full LoRaWAN stack. Your HackRF and Meshtastic devices can capture and analyze these proprietary protocols. The T-Embed CC1101 handles additional sub-GHz protocols entirely outside the LoRa ecosystem, making it valuable for comprehensive IoT security assessments.
How do I extract encryption keys from LoRaWAN devices for testing? For devices you’re authorized to test, firmware extraction via JTAG or SPI flash reading typically reveals hardcoded keys. Many devices store AppKey, NwkKey, or session keys in plaintext in flash memory. Alternatively, capture the join procedure with your gateway setup to derive session keys from observed traffic if you control the network server.
What’s the actual range I should expect for LoRa security testing? Line of sight with proper antennas, you’ll capture signals 5-10km easily. Urban environments with buildings reduce that to 2-5km typically. Your HackRF with a tuned sub-GHz antenna significantly outperforms Meshtastic devices for passive listening range. I’ve captured LoRa packets from smart parking sensors 8km away using the HackRF at maximum gain with an outdoor yagi antenna.
The infrastructure is one thing. Actually running tests and generating findings is another. Start with a controlled environment where you own all the equipment, can document baseline behavior, then introduce vulnerabilities systematically.
Your first project should be testing your own gateway and devices against the OWASP IoT Top 10. Weak credentials, insecure defaults, lack of update mechanisms, insufficient physical security. These aren’t exotic LoRa-specific vulnerabilities. They’re fundamental issues that affect LoRaWAN deployments just like any other IoT system.
Once you’ve documented those basics, move into protocol-specific testing. The frame counter attacks, join replay scenarios, downlink injection examples I covered earlier. Build a test matrix, work through each scenario, document results, and understand not just what failed but why it failed and how to fix it.
When you’re ready to start picking up client work, you’ll have a portable lab that demonstrates real capability. Walk into a meeting with a Meshtastic device, capture packets from their smart building sensors while sitting in the lobby, and show them decrypted sensor readings on your laptop. That demonstration buys credibility that vendor certifications never will.
Your lab builds over time. I started with a single Meshtastic device and a cheap RTL-SDR dongle three years ago. Now I’ve got HackRF, LimeSDR, multiple Raspberry Pi gateways, and enough LoRa hardware to test most scenarios I encounter. Start small, test thoroughly, and expand based on what you’re actually finding in real assessments.
The complete hardware setup including Meshtastic devices, development boards, and SDR equipment sits at wai-works.com if you want to build this same capability without hunting components across multiple vendors. But more important than the specific hardware is understanding the methodology. The tools evolve. The approach to finding and documenting vulnerabilities remains constant.
