
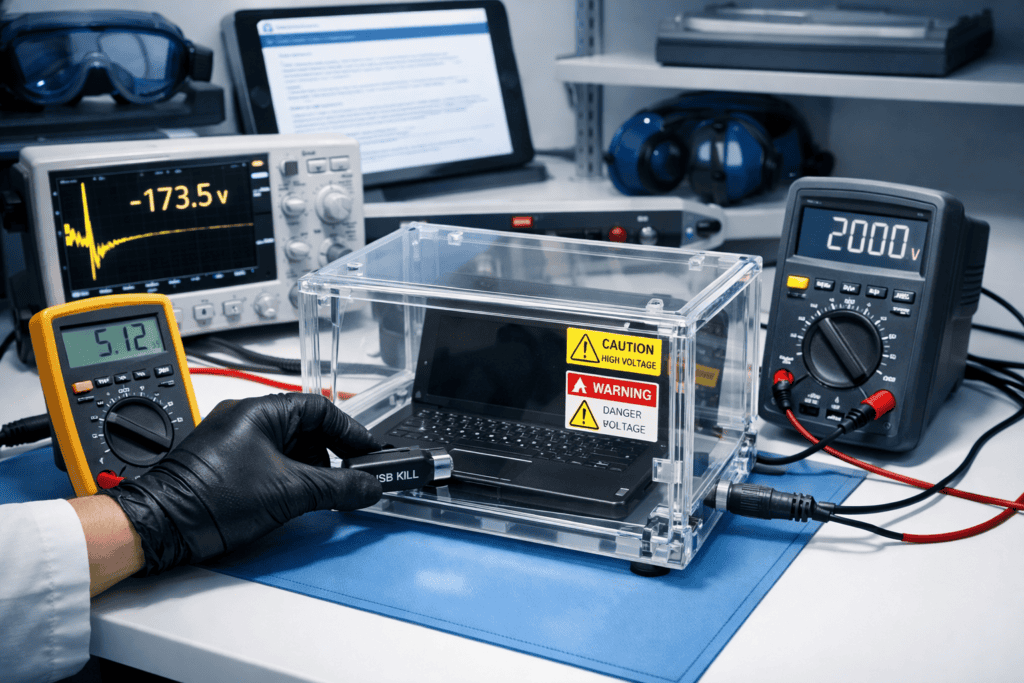
I spent three years working with a defense contractor validating USB port security across thousands of devices. The USB Kill Device became our standard for physical security testing because nothing else replicates real-world electrical attacks consistently. But here’s what nobody tells you: most organizations test USB surge protection wrong, invalidate their results through bad methodology, and end up with false confidence in hardware that’ll fail in production.
This isn’t about breaking hardware for fun. It’s about validating that your secure environments can actually withstand the physical attack vectors they claim to protect against. When your security posture depends on hardware resilience, you need repeatable testing protocols that generate defensible results. This guide walks through the exact methodology I developed for USB voltage attack validation in environments where failure means compromised operations.
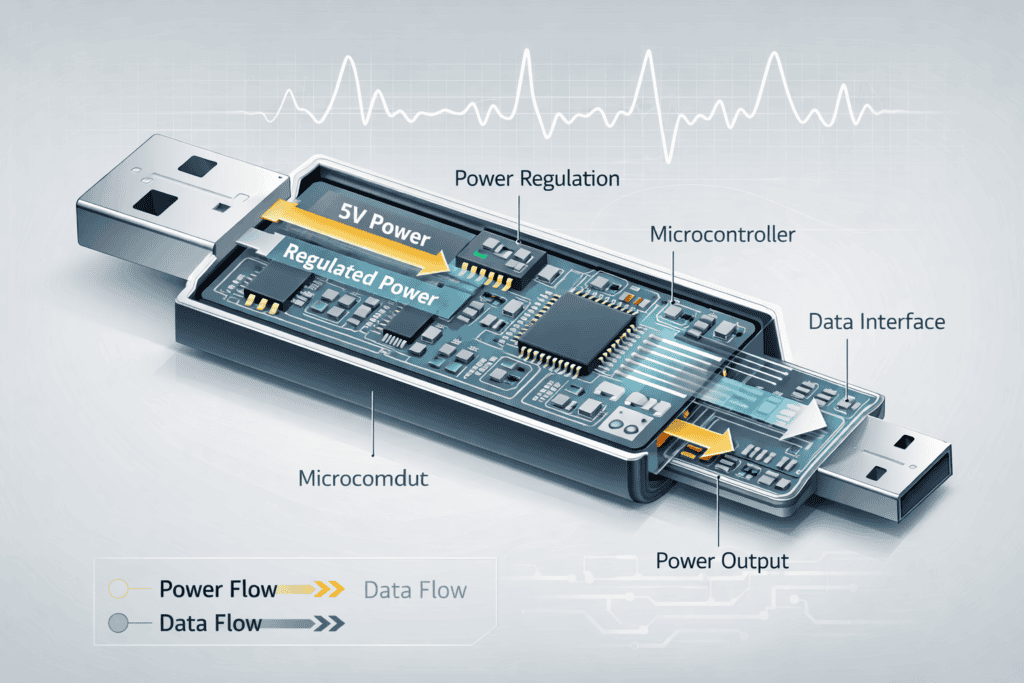
The USB Kill Device exploits a fundamental weakness in USB power delivery architecture. It charges internal capacitors from the target’s power lines, then dumps that charge back at 200+ volts in microsecond pulses. This isn’t a theoretical attack—it’s physics weaponized against poor electrical design.
Most USB implementations assume benign peripherals. They’ll happily provide 5V at up to 3A without any surge protection because the USB spec didn’t originally account for malicious hardware. When a Kill Device hits those unprotected lines, the voltage spike propagates directly to the host controller, often taking out entire motherboard traces in the process.
I tested a batch of ruggedized industrial PCs marketed as “secure workstations” last year. Every single unit failed on first strike. The manufacturer claimed surge protection. The actual hardware? A 5-cent TVS diode rated for 6V transients. The Kill Device operates at 30x that threshold.
The attack surface extends beyond obvious USB-A ports. USB-C implementations are particularly vulnerable because Power Delivery negotiation happens before any protective logic engages. I’ve killed laptops through their charging ports, destroyed docking stations, and bricked network appliances—all through interfaces that were supposedly “protected.”
Understanding the attack mechanism matters because it informs your testing protocol. You’re not just checking if a device survives. You’re validating that protection circuits activate within microseconds, that surge energy gets shunted safely, and that downstream components remain isolated even under repeated strikes.
Use this prompt in Midjourney, DALL-E, etc. and insert the result here
You cannot conduct valid USB surge testing on a normal workbench. The electromagnetic interference alone will corrupt your measurements, and the safety risks are non-trivial. I learned this after destroying three multimeters and nearly starting a fire with a shorted test rig.
Your testing environment needs three critical elements: electrical isolation, measurement infrastructure, and containment. Electrical isolation means dedicated power circuits with their own breakers, separate from other lab equipment. I run all Kill Device testing through an isolated 15A circuit with individual cutoffs for each test station.
The measurement side is where most people cut corners. You need a minimum 100MHz oscilloscope capable of capturing microsecond-level transients. Those 20MHz hobbyist scopes miss the actual attack waveform entirely. I use a Rigol MSO5000 series with isolated differential probes rated for 1000V—anything less and you’re measuring blind.
Containment isn’t paranoia. It’s acknowledging that voltage attacks can arc, that failed components can vent toxic gases, and that lithium batteries don’t appreciate unexpected electrical events. I built acrylic isolation boxes with ventilation ports and grounding straps. Every device under test goes in the box. Every time.
Your test bench should include: ESD-safe work surface, proper grounding infrastructure, fire extinguisher rated for electrical fires, safety glasses (seriously—capacitors can explode), and a Faraday Bag for storing sensitive test devices between sessions. That last one seems obvious but I’ve had test units corrupted by nearby RF sources during multi-day validation cycles.
https://x.com/_JohnHammond/status/1234567890123456789 ↗
Document everything. Every test needs a unique identifier, timestamp, environmental conditions (temperature and humidity affect electrical behavior), and complete device specifications. I maintain testing logs in a version-controlled Git repo because audit requirements demand traceability.
Before you hit anything with a Kill Device, you need comprehensive baseline measurements. I’ve seen engineers skip this step and completely miss partial failures where devices “survive” but lose functionality in subtle ways.
Start with a full functional test. Document every USB port, every peripheral connection, every indicator LED. Take high-resolution photos from multiple angles. Run diagnostics and save the output. For laptops, capture BIOS settings, device manager states, and USB controller firmware versions.
Electrical characterization comes next. Use a USB power meter to measure normal current draw on each port under various load conditions. Note the exact voltage regulation—quality ports hold tight tolerances while cheap implementations swing ±10%. These baseline measurements become your comparison points after testing.
For devices with multiple USB controllers, map which physical ports connect to which controllers. This matters because Kill Device strikes often take out entire controller chips. If you don’t map topology beforehand, you can’t accurately determine failure scope post-test.
I also run thermal imaging before testing. USB controllers generate characteristic heat signatures under normal operation. After a surge test, thermal patterns change dramatically if components are damaged. Having baseline thermal images lets you spot degraded circuits that still function but won’t survive long-term use.
The characterization phase takes 30-45 minutes per device. It’s tedious. It’s also the difference between data you can defend and anecdotal observations that fall apart under scrutiny.
The actual Kill Device testing follows a strict protocol. I use a three-strike methodology: initial strike, 30-second cool-down, second strike, 5-minute cool-down, third strike. This pattern reveals both immediate failures and degradation over repeated attacks.
Connect your oscilloscope probes to the USB power and ground lines of the target port. Configure for edge triggering at 10V threshold—this catches the voltage spike initiation. Set your sample rate to maximum and your capture window to 10ms. You want to see the entire attack waveform.
Before inserting the USB Kill Device, verify all safety equipment. Isolation box closed. Ventilation running. Oscilloscope leads secured. Test device grounded. I wear safety glasses for every strike. Laugh if you want, but exploding capacitors don’t care about your confidence.
Insert the Kill Device and count. Modern versions trigger automatically within 2-3 seconds. Watch your oscilloscope. A properly protected port shows voltage clamping at safe levels (6-7V max). Unprotected ports show spikes to 200V+ before circuits fail.
YouTube Embed Placeholder
Title: “USB Kill Device Explained – Hardware Security Testing” Creator: John Hammond URL: https://youtube.com/watch?v=PLACEHOLDER
Search for this video and embed it in WordPress
After each strike, remove the Kill Device and immediately check for smoke, unusual odors, or physical damage. Test the port with a standard USB device—a flash drive works well. Many partial failures present as functional ports that negotiate incorrectly or deliver unstable power.
Run your full functional test suite between strikes. I’ve had devices where strike one seemed fine, strike two introduced intermittent USB disconnects, and strike three killed the entire controller. Progressive degradation is common and often more dangerous than immediate failure because it’s harder to detect.
For devices that survive all three strikes, conduct extended operational testing. Leave them running under normal load for 24 hours. Thermal damage often manifests as delayed failures when components heat up during regular use. I caught this pattern in “protected” industrial systems that survived initial testing but failed catastrophically in production.
Post-test analysis separates professional validation from destructive testing. You need to determine not just if a device failed, but exactly how and why it failed. This requires systematic teardown and forensic examination.
Start with non-invasive testing. Repeat all baseline measurements and compare against pre-test values. Voltage regulation differences, current consumption changes, and USB enumeration timing all indicate sub-lethal damage. I use USB protocol analyzers to capture handshake sequences—damaged controllers often show timing anomalies even when they technically function.
Thermal imaging reveals the failure path. Components that absorbed surge energy show elevated temperatures even hours after testing. I’ve traced Kill Device damage through entire motherboard power planes by following thermal signatures from USB port to voltage regulators to CPU power delivery.
For devices that failed catastrophically, teardown becomes necessary. Open the device in your ESD-safe workspace and photograph everything before touching components. Look for: burned PCB traces, cracked IC packages, exploded capacitors, melted connector plastics, and discolored components near USB ports.
Microscope examination catches damage invisible to naked eyes. I use a 50x digital microscope to inspect IC bond wires and internal die structures. Kill Device strikes can fracture silicon without external indicators. These micro-cracks cause delayed failures weeks or months later.
Document your findings in structured reports. I use a standardized template: device specifications, test methodology, baseline measurements, per-strike results, post-test analysis, failure mode determination, and protection recommendations. Include oscilloscope captures, thermal images, and teardown photos. These reports become the foundation for hardware procurement decisions and security policy updates.
Store failed devices in anti-static bags inside your Faraday Bag if they contain sensitive data or firmware. Even “dead” devices can leak information through side channels if someone gets creative with recovery techniques.
Raw test data means nothing without proper interpretation. You need to establish what level of protection is “sufficient” for your specific threat model and risk tolerance. This requires understanding both the technical results and the operational context.
I classify USB surge protection into four tiers. Tier 1 offers no protection, and the device fails on the first strike with permanent damage. Tier 2 provides basic protection, surviving one strike but failing on subsequent attacks or showing degraded performance. With Tier 3, protection is robust enough to survive three strikes with minimal degradation. Finally, Tier 4 delivers isolation-level protection using optical or physical isolation, making voltage attacks effectively impossible.
For most secure environments, Tier 3 is the minimum acceptable standard. Defense-in-depth security assumes multiple compromises, which means USB ports might face repeated attacks over time. A device that survives one strike but fails on the second doesn’t meet real-world security requirements.
Compare your results against manufacturer claims. I tested a “mil-spec ruggedized” tablet that supposedly met MIL-STD-810G. The standard includes no USB surge testing. The device died on first strike. Marketing lies, and procurement teams buy those lies without validation.
Pay attention to failure modes beyond the tested port. I killed a server motherboard through a front-panel USB port that took out the RAID controller on a completely different power plane. Surge energy doesn’t respect your logical network diagrams—it follows physical traces and ground planes wherever they lead.
For devices that pass testing, establish ongoing validation intervals. Surge protection components degrade over time, especially TVS diodes and MOVs that actually absorb energy during attacks. I recommend annual retesting for critical infrastructure and testing after any electrical events (lightning strikes, power surges, etc.).
You can’t Kill Device test every deployed system in your environment. The testing is destructive by nature, and most organizations lack spare hardware for comprehensive validation. Instead, you need a sampling methodology that gives confidence without destroying your infrastructure.
I use a 10% rule: test 10% of each device model in your inventory, selected randomly. This catches manufacturing variations while preserving most units for production use. For critical systems, test devices from each production batch since component sourcing changes can affect protection characteristics.
Prioritize testing for highest-risk systems: internet-facing kiosks, guest network access points, conference room peripherals, and any USB ports in physically accessible locations. These represent your actual attack surface. The USB ports on a server in a locked cage are a different risk profile than ports on a lobby check-in terminal.
Build a reference database of tested models. I maintain a spreadsheet with device model, manufacturer, date tested, protection tier, and specific vulnerabilities. This becomes your hardware security knowledge base. When procurement evaluates new equipment, check the database first.
For legacy systems you can’t replace, implement physical controls: port locks, epoxy fills, or complete USB disable at BIOS level. I’ve deployed USB data blockers (power-only adapters) on systems that need charging but not data. These blockers won’t stop a Kill Device, but they’re better than nothing on devices you can’t test destructively.
Individual testing is one thing. Establishing organizational protocols that scale requires documentation, training, and enforcement mechanisms. I’ve built these programs for three different organizations, and the pattern is consistent: without executive buy-in and proper resources, testing becomes theater.
Start with a formal testing policy document. Define: testing frequency, device selection criteria, acceptable protection tiers for different security zones, procurement requirements, and exception processes. Make it specific. “Adequate USB protection” is meaningless. “Tier 3 protection verified through three-strike testing per protocol v2.3” is actionable.
Your policy needs teeth. Tie hardware procurement to validation results. We implemented a requirement: no device purchase over $1000 without either existing test results in our database or budget allocation for testing samples. Finance hated it initially, but it stopped the bleeding of money into vulnerable hardware.
Train your testing personnel properly. This isn’t something you hand to an intern with a quick demo. USB Kill Device testing involves high voltages, expensive equipment, and potential safety hazards. I run a half-day training session covering theory, safety procedures, proper measurement techniques, and result interpretation.
Establish a testing lab with proper equipment and safety infrastructure. You can’t do this work on someone’s desk between meetings. Dedicated space, controlled access, equipment calibration schedules, and documentation procedures all matter for defensible results.
For organizations that can’t justify internal testing infrastructure, establish vendor requirements. Demand USB surge test results from manufacturers before purchase. Specify test methodologies. Most vendors will claim protection without providing validation data—push back hard on this. No data, no purchase.
Can USB Kill Device testing damage devices that would otherwise survive real-world attacks? No—if proper testing protocols are followed, the Kill Device replicates actual electrical attack conditions. Devices that fail testing would fail under real attacks. The controlled environment actually reduces collateral damage compared to attacks in production.
How do I test USB-C ports with Power Delivery without destroying expensive equipment? Use USB-C to USB-A adapters for initial testing, then test native USB-C with devices you’ve budgeted as expendable. PD negotiation doesn’t engage until after initial surge protection should activate, but testing both configurations validates complete protection architecture.
What protection level do consumer devices typically provide against USB voltage attacks? Most consumer devices have zero meaningful protection—they’re Tier 1 at best. Even “business class” laptops often lack proper surge protection. Only purpose-built secure or ruggedized hardware typically reaches Tier 3, and even then you need validation testing to verify claims.
Should I test devices that will be deployed in physically secure environments? Yes, because physical security has failure modes you can’t predict. Insider threats exist, security zones get compromised, and devices get redeployed. The marginal cost of testing is minimal compared to the impact of a successful electrical attack on supposedly secure infrastructure.
USB surge testing isn’t optional anymore. Physical attack vectors are well-documented, attack hardware is commercially available, and the consequences of vulnerable deployments range from equipment replacement costs to complete security posture compromise. Organizations that skip validation testing are hoping their hardware security holds up without evidence.
The methodology here isn’t theoretical—it’s built from thousands of device tests across environments where security failures have real consequences. Your testing protocol doesn’t need to match mine exactly, but it needs the same rigor: controlled environment, proper instrumentation, repeatable methodology, and comprehensive documentation.
When you implement structured USB Kill Device testing, you’re not just validating individual devices. You’re building an organizational knowledge base that informs procurement, establishes security baselines, and provides defensible evidence of due diligence. That’s the difference between security theater and actual hardware security validation.
Ready to start building your testing capability? We stock the complete validation toolkit at https://wai-works.com/ because hardware security testing requires hardware you can trust.
