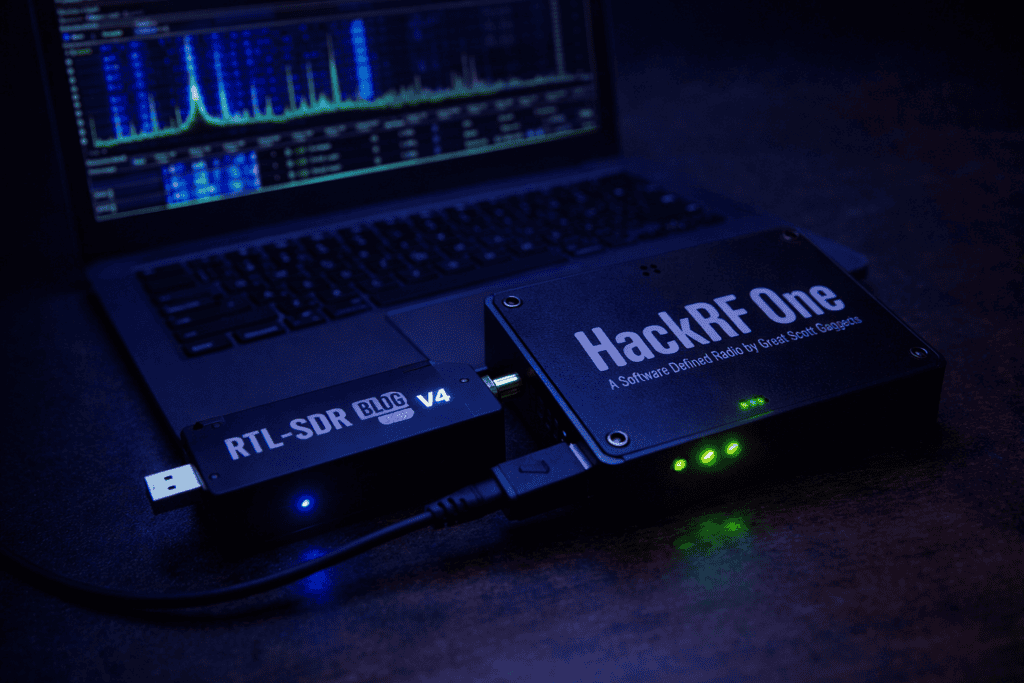
You’re staring at a frequency range that shouldn’t be there. It could be a rogue IoT device on a client network or a suspicious signal appearing repeatedly during your security audit process. You need to capture it, analyze it, and if the scope allows, replay or manipulate it. The question isn’t whether you need an SDR. It’s which one won’t leave you stuck halfway through the engagement when you realize you bought the wrong tool. The HackRF One vs RTL-SDR debate matters because one is a $25 receiver that gets you started, and the other is a $300+ transceiver that actually lets you transmit. I’ve used both extensively in the field, and the “right” answer depends entirely on what you’re actually doing with RF security testing.
The single most important thing to understand about HackRF One vs RTL-SDR is transmit capability. The RTL-SDR is receive-only. You can listen to signals across its frequency range, decode protocols, capture handshakes, and analyze spectrum activity. What you cannot do is transmit anything back. The HackRF One is a half-duplex transceiver covering 1 MHz to 6 GHz. You can receive and transmit, just not simultaneously.
When I first started RF security work, I made the mistake of assuming receive-only would cover most scenarios. It doesn’t. The moment you want to test replay attacks against a car key fob, spoof a wireless sensor, or validate that a device properly handles malformed packets, you need transmit capability. I burned through two weeks of a project timeline before realizing my RTL-SDR setup couldn’t actually perform the active tests the client needed.
That said, if your work is purely passive monitoring, signals intelligence gathering, or protocol analysis where you’re just observing what’s in the air, the RTL-SDR punches way above its price point. I keep both in my kit because there are scenarios where I specifically want the lightweight, low-cost option that won’t raise eyebrows if it gets damaged in the field. The HackRF One lives in my primary pentest bag. The RTL-SDR stays in my vehicle as a backup and quick-recon tool.
The frequency range also matters more than most people realize. The RTL-SDR Blog V4 covers roughly 500 kHz to 1.7 GHz with decent performance. HackRF One spans 1 MHz to 6 GHz. For most IoT, wireless sensors, and common RF protocols, both cover the necessary spectrum. But if you’re working with 5 GHz Wi-Fi, radar systems, or certain satellite communications, only the HackRF will get you there.
Passive monitoring and protocol analysis is where the RTL-SDR dominates on cost-effectiveness. I’ve used it to map out the entire wireless sensor network in a manufacturing facility, identify unauthorized LoRa devices on a client’s campus, and capture enough ASK/OOK signals from various access control systems to understand their modulation schemes. For these tasks, receive-only is perfectly adequate, and the RTL-SDR’s small form factor makes it easy to deploy in places where a larger HackRF setup would be conspicuous.
The first time I needed to validate a replay attack vulnerability against a wireless garage door opener, the limitations hit hard. I’d captured the signal perfectly with the RTL-SDR, analyzed it in Universal Radio Hacker, understood the protocol completely, but had no way to actually transmit the replayed signal to confirm the vulnerability existed. I had to wait three days for a HackRF One to arrive before I could complete that phase of testing. That delay taught me an expensive lesson about scoping hardware requirements before accepting an engagement.
Active RF pentesting absolutely requires transmit capability. Testing jamming resistance, validating frequency hopping implementations, spoofing sensor data to test ICS security, replaying captured key fob signals, these all need a transceiver. The HackRF One becomes essential the moment you move beyond observation into actual security testing that involves interaction with target systems.
Spectrum analysis and signal hunting is another area where tool choice matters. When I’m doing initial reconnaissance on an unfamiliar frequency range, I’ll often start with the RTL-SDR paired with something like GQRX or SDR# just to get a visual map of what’s active. It’s fast, it doesn’t require a lot of power, and if I need to leave it running for hours capturing intermittent signals, I’m not tying up my more expensive hardware. Once I’ve identified interesting targets, I’ll switch to the HackRF for deeper analysis and any active testing phases.
Sample rate and bandwidth directly impact what you can capture and how accurately. The RTL-SDR Blog V4 maxes out at about 2.56 Msps (mega samples per second) with roughly 2.4 MHz of usable bandwidth. The HackRF One handles up to 20 Msps with 20 MHz of instantaneous bandwidth. In practical terms, this means the HackRF can capture wider chunks of spectrum simultaneously and handle faster protocols without aliasing issues.
When I was analyzing a proprietary wireless protocol that used frequency hopping across a 10 MHz range, the RTL-SDR couldn’t capture the full hop sequence in one pass. I had to either tune around manually trying to catch hops or set up multiple dongles. The HackRF captured the entire sequence cleanly in a single recording session. For narrowband signals, sub-GHz IoT stuff, basic ASK/FSK protocols, the RTL-SDR’s bandwidth is usually sufficient. For anything involving spread spectrum, wide frequency hopping, or high-speed digital modes, you’ll want the HackRF’s wider capture capability.
Dynamic range and sensitivity determine how well you can pick out weak signals from noise or capture strong and weak signals simultaneously. The RTL-SDR has roughly 50-55 dB of dynamic range depending on configuration. The HackRF One sits around 60-65 dB. Neither is competition-grade measurement equipment, but both are adequate for security testing. Where I notice the difference is in noisy RF environments. At a recent site assessment in an industrial facility with tons of wireless equipment, the HackRF handled the interference better and could still pick out the low-power sensor signals I was trying to analyze. The RTL-SDR got overwhelmed in sections of the building.
Frequency accuracy matters if you’re doing precision work or need to stay within specific regulatory constraints when transmitting. Both devices use temperature-compensated crystal oscillators, but neither is GPS-disciplined out of the box. I’ve measured both to be within a few parts per million, which is fine for most security work. If you need better accuracy, you can add an external 10 MHz reference to the HackRF. The RTL-SDR can be calibrated in software using known reference signals like FM broadcast stations or ADSB aircraft transponders.
GNU Radio compatibility is where both devices excel, but the HackRF’s transmit capability opens up significantly more complex flowgraphs. I spent my first month with the RTL-SDR working through basic GNU Radio tutorials, building receivers for various protocols, getting comfortable with DSP concepts. That foundation was essential. When I moved to the HackRF and started building transmit chains, I already understood half the equation. If you’re new to SDR, starting with the RTL-SDR makes sense purely from a learning curve perspective. You can focus on understanding reception and demodulation without the added complexity and responsibility of transmit testing.
Universal Radio Hacker has become my go-to tool for protocol analysis and both the RTL-SDR and HackRF integrate seamlessly. The workflow is identical whether you’re using one or the other for the receive side. Where the HackRF pulls ahead is in URH’s fuzzing and replay features. Being able to capture a signal, modify specific bits, and immediately transmit the modified version back is incredibly powerful for finding parsing vulnerabilities in wireless protocols. I’ve discovered buffer overflows and authentication bypasses in proprietary IoT protocols using exactly this approach.
Platform support is mature for both devices. Linux support is excellent across the board since most serious RF work happens on Linux anyway. Windows support is functional but occasionally quirky, particularly with USB drivers. MacOS support exists but isn’t always prioritized by tool developers. I do all my RF work on a dedicated Ubuntu laptop specifically because the driver stack and software compatibility is most reliable there. Both devices work fine with Kali Linux out of the box, which is convenient if you’re already using Kali for other pentesting work.
The community and documentation ecosystem heavily favors the RTL-SDR for beginners simply because it’s been around longer and more people own one. The RTL-SDR subreddit is active, the osmocom wiki has extensive documentation, and you’ll find YouTube tutorials covering virtually every common use case. HackRF documentation is solid but more scattered. The Great Scott Gadgets documentation is thorough, but you’ll need to supplement it with blog posts, GitHub issues, and community forums to find solutions for specific problems. In my experience, when I hit a wall with the RTL-SDR, I can usually find someone who’s solved that exact problem. With the HackRF, I’m more likely to be figuring it out from first principles.
The RTL-SDR Blog V4 costs around $40 delivered. For that price, you get a capable receive-only SDR that covers most common frequencies used in security testing. If you’re starting out, trying to understand whether RF security work interests you, or building a training lab on a budget, it’s a no-brainer purchase. I’ve bought half a dozen RTL-SDRs over the years for various projects and I’ve never regretted a single one. They’re cheap enough that if one gets damaged, lost, or needs to stay deployed long-term for monitoring, it’s not a significant financial loss.
The HackRF One costs $300-350 depending on where you source it and whether you’re buying the Great Scott Gadgets original or a clone. That’s a meaningful investment that needs to be justified. If you’re doing professional RF pentesting as part of paid engagements, the cost amortizes quickly. On my first engagement where I used the HackRF to validate replay attack vulnerabilities in a client’s wireless access control system, the testing findings alone generated enough additional work to pay for the hardware three times over. If you’re a hobbyist or student, that price point is harder to justify unless you know you’ll use the transmit capability regularly.
There’s a middle ground I’ve seen work well for people starting out. Buy the RTL-SDR first. Use it for three to six months. Learn the fundamentals of SDR operation, RF security concepts, and protocol analysis. If you find yourself consistently running into scenarios where you need transmit capability, then justify the HackRF purchase. If most of your work stays in the passive monitoring realm, save your money and invest in better antennas for the RTL-SDR instead. A quality antenna setup will improve your results far more than upgrading to a transceiver you don’t actually need.
Power requirements and portability affect how you actually use these devices in the field. The RTL-SDR draws about 300mA from USB, so it runs happily off a laptop USB port or even a phone with a USB OTG adapter. I’ve run my RTL-SDR off a Raspberry Pi Zero powered by a battery bank for portable spectrum monitoring deployments. The HackRF draws significantly more power, up to 500mA during receive and can spike higher during transmit. You’ll want a quality USB port, ideally USB 3.0, to ensure stable operation.
Antenna considerations change depending on which device you’re using. Both have SMA connectors, so antenna compatibility isn’t an issue. What changes is how much you need to care about antenna selection. With the RTL-SDR, you’re only receiving, so a mediocre antenna just means you won’t pick up weaker signals. With the HackRF, transmit performance is directly tied to antenna quality and impedance matching. I learned this the hard way when I couldn’t get reliable range on a replay attack test because I was using a cheap rubber duck antenna. Switched to a proper quarter-wave ground plane antenna and immediately got the range I needed. If you’re buying a HackRF, budget for decent antennas.
The physical form factor matters more than you’d expect. The RTL-SDR is small enough to tuck into a pocket or leave connected to a hidden Pi for persistent monitoring. The HackRF One is larger, requires a proper enclosure if you’re moving it around, and generally feels more like a piece of test equipment than a disposable dongle. For overt testing where the client knows you’re doing RF security work, this doesn’t matter. For red team engagements where you need to be discreet, the size difference is significant.
Operating within your local regulations is non-negotiable, particularly with transmit-capable SDR hardware. The HackRF One can transmit on virtually any frequency from 1 MHz to 6 GHz. Most of those frequencies require a license to transmit on legally. In the US, amateur radio bands require an FCC license, while ISM bands have power limits and many frequencies forbid unlicensed transmission. An amateur license covers useful bands but doesn’t allow all transmission types needed for security testing engagements.
Client authorization and scope documentation becomes critical with the HackRF. Every engagement where I use transmit-capable SDR equipment includes explicit language in the scope document about RF testing, specific frequencies that may be used, potential for interference with nearby systems, and clear authorization from the client. I’ve had legal counsel review my standard RF testing authorization language because the regulatory exposure is real. Transmitting on licensed frequencies without authorization isn’t just a contract violation or ethical issue, it’s a legal violation that can result in significant fines.
The RTL-SDR sidesteps most of these concerns because it’s receive-only. You can legally listen to almost anything that’s being broadcast over the air, with some exceptions around encrypted government communications. For passive security assessments, wireless network surveys, and spectrum analysis, you’re on much safer legal ground. This is one reason I recommend people start with receive-only equipment. You can learn RF security concepts without the regulatory complexity.
My current kit includes both devices plus supporting hardware, and I reach for different combinations depending on the engagement. For initial reconnaissance and spectrum mapping, I’ll deploy the RTL-SDR because it’s quick, low-power, and I can leave it running unattended if needed. Once I’ve identified interesting signals and the engagement moves into active testing phases, the HackRF comes out for transmission work. Having both means I can simultaneously monitor responses while transmitting test signals, which is incredibly useful for protocol fuzzing work.
Complementary tools make both SDRs more effective. I pair them with the TinySA Ultra for quick spectrum checks and antenna tuning before any serious testing. A quality signal generator helps confirm your SDR setup works before blaming the target system. Antennas matter more than most realize. I have invested about $500 across different frequency ranges, since the right antenna often determines whether you capture signals cleanly or miss them entirely.
Budget progression makes sense if you’re building RF capability over time. Start with the RTL-SDR and basic antennas. Add GNU Radio and Universal Radio Hacker. Spend time actually using the equipment on practice targets, cheap wireless doorbells, car key fobs you own, LoRa sensors, whatever. Once you’re comfortable with the workflow and understand what you’re looking at, step up to the HackRF. Then gradually add specialized antennas, filters, amplifiers, and other RF gear as specific needs arise. I’ve been building my RF kit for four years and I’m still adding pieces when I encounter new requirements.
Can the RTL-SDR transmit any signals or is it strictly receive-only? The RTL-SDR is receive-only hardware with no real transmit capability. Early use of its test signal generator allowed only extremely weak transmissions, making it impractical; for real transmitting, use a transceiver like HackRF One.
What’s the actual usable frequency range difference between HackRF One and RTL-SDR for security testing? RTL-SDR Blog V4 spans 500 kHz to 1.7 GHz, suitable for sub-GHz IoT, 900 MHz ISM, and some 2.4 GHz signals. HackRF One spans 1 MHz to 6 GHz, adding coverage for 5 GHz Wi-Fi, some radar bands, and satellite frequencies. For typical IoT and wireless sensor pentesting, both cover the necessary range.
Is the HackRF One worth the price difference if I only do occasional RF security testing? Upgrade only if you need transmit features like replay, active testing, or signal injection otherwise RTL-SDR is sufficient for passive RF work. Evaluate your actual testing requirements before spending $300 on transmit capability you might not use.
Do I need an amateur radio license to legally use the HackRF One for security testing? Licensing requirements vary by location and the transmission frequencies used during testing. In the US, amateur licenses cover many bands but not all transmission types needed for security testing. You’ll also need explicit authorization from the client to perform RF transmission testing on their systems. Consult with legal counsel familiar with telecommunications regulations in your jurisdiction.
The HackRF One vs RTL-SDR decision ultimately comes down to transmit requirements. If your security work involves active RF testing, you need the HackRF’s transceiver capability despite the higher cost. If you’re focused on monitoring, analysis, and learning fundamentals, the RTL-SDR delivers exceptional value. Start with receive-only hardware, build skills, then upgrade to transmit-capable tools when engagement needs clearly justify the investment. Both devices have earned permanent spots in my toolkit because they solve different problems effectively. Building your RF security capability starts with understanding what you’ll actually test in the field. Explore SDR hardware and supporting tools that match your testing methodology rather than chasing specifications you might never use. Browse the full range of pentesting hardware at the Wai Works shop.
